Since they have so many parts, I think pinning is essential when assembling Heavy Gear Blitz! miniatures. Otherwise, they break or shatter very easily.
Now I have to say a few words first: I'm no professional modeller. Neither am I a pro painter. Take the following with a grain of salt and try things out for yourself. Because you're working with small parts, you have to always use your judgment and be careful so you don't mess up an expensive miniature.
1) Be careful with your hand drill. Use light pressure to create a guiding hole and don't let the tip of your drill move around. I don't know how many guns I've destroyed; thankfully, Blitz! miniatures come with enough spare guns to field a couple small armies.
2) Don't use too much glue. If you're pinning, you want just enough to ensure the pin is solidly in place and keeps the joint solid. Soak any excess glue off with a bit of tissue, so as not to have dried superglue masking off your mini's details.
3) Keep your workspace neat and all you miniature parts in safe compartments so you never throw a Gear's arm with the trash. Yeah, I did that. You can point and laugh now.
 First, Separate all the bits. Choose which weapon you're going to use. Remove the basing slot. Clean all mold lines and repair any defect before moving on to the next step. Here, I'm working with an Anolis Gear.
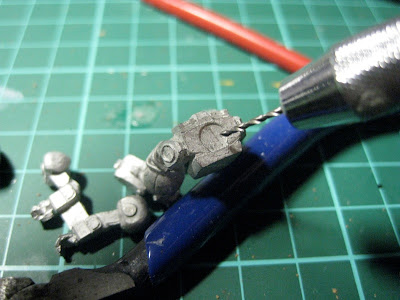
 Drill a hole in the middle of the circle in the leg half of the miniature. This is usually not necessary, but with this particular miniature, the joint will be too flimsy without a pin. I always simply "eyeball" my holes and I've never had any problems. Just be careful and always "dry fit" parts before actually gluing them together.
 Here you can see the hole. Only a couple millimeters deep is enough.
  Insert the pin. I always use bits of metal paperclips cut in short segments. It's cheap, and it still has a little bit of flexibility to it, as opposed to something like an actual pin, which is more likely to break in case of shock.
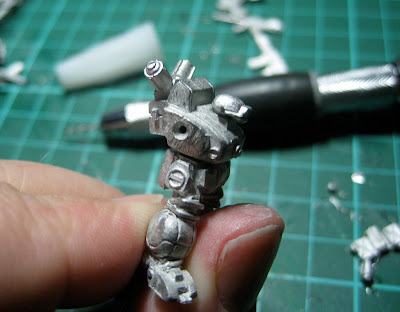
 Do the same thing for the backpack, being very careful to keep your holes aligned and not to drill all the way through the backpack.
 At this point glue together legs, torsos, and backpack. Your miniature's pose is going to be pretty much final after this point, so think it through.
 Here I glued the head on, which doesn't require pinning, and Ive drilled a hole where the arms will fit. Again, this will act to reinforce the bond between limbs and torso.
 Stick pins in the drilled holes and glue them in. Make sure the pins are roughly aligned together, so that your Gear's shoulders don't have a weird look to them later on.
 Your weapons are going to stick out and come off easily if you don't make sure they are sturdy enough. Here, I have used a pin in the fist, again being careful not to drill all the way through. Drill a matching hole where the gun handle is. The gun is a small part, so be extra careful and take your time. Start by drilling very lightly so as to create a guiding hole in the gun and then go for it. If you drill too hard right away, chances are you'll misalign your pin or damage you weapon.
 Here, I have affixed a medium rifle to my Anolis. Yes, I know it's an illegal swap. Sue me. The problem with this Gear and the arms I have to go with it is that the Very Light Autocannon it's supposed to carry just doesn't fit: it's to small for the barrel to rest into the Gear's left hand. Plus, The medium rifle looks better.
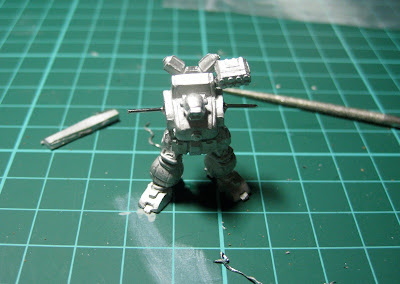
 Finally, I drill holes into both feet and stick in longer bits of paper clip. These will be used to pin the Anolis into it's base, but also to insert into a wine cork or something similar during priming, painting and finish. You want to keep your fingers off you miniature as much as possible while you're working on it.
And... Voilà!
Feel free to give me feedback, as I'm always eager to improve my modelling skills.

Great tutorial!
ReplyDelete